

When a corset dress reaches our pattern department, we first look at how the bodice is constructed, not just how it appears in a reference photo. Cup placement, panel shaping, boning channels and the internal lining all influence the final fit. When these details are unclear, the pattern maker may need to revisit parts of the construction after the first sample is made.
What Should You Include in a Corset Dress Tech Pack?
Unlike a basic fitted dress, a corset style relies on several construction elements to hold its shape. The outer fabric, shaped bodice panels, cups, internal support and back closure all need to work together.
Before sending your files to a clothing manufacturer, check whether you have covered the following:
| Section | Information to Prepare |
|---|---|
| Technical Drawings | Front, back and internal construction views |
| Measurement Chart | Bust, underbust, waist, hip and bodice length |
| Fabric Details | Main fabric, lining, interfacing and fabric weight |
| Cup Specifications | Cup shape, depth, position and support |
| Boning Details | Type, placement and channel construction |
| Closure | Zipper, lace-up back or hook-and-eye |
| Sewing Details | Panel seams, reinforcement and finishing |
| Colorways | Fabric colors, trims and hardware finishes |
| Branding | Main labels, care labels and hangtags |
You may not have every specification finalized when you first approach a factory. That is not necessarily a problem. What matters is making clear which details are approved and which still need discussion.
You may already have selected the outer satin while the reinforcement layer is still undecided. In that case, list the satin specification and mark the internal material as pending technical review. The factory can then assess the support requirements without treating an unfinished choice as an approved instruction.
How to Prepare Technical Drawings for a Corset Dress
A fashion illustration communicates the overall look, but it rarely provides enough information for pattern development. The technical flat needs to show the panel divisions, seam placement, neckline construction and how the different sections are joined.
For a corset dress, a front and back view are essential, but they may not be enough when the bodice has several shaped panels or internal support components.
Front and Back Views
Start with a clean front flat showing the neckline, cup shape, bodice panels, waistline and skirt attachment. Mark the position of princess seams and any visible decorative stitching.
On the back flat, identify the closure clearly. A lace-up opening needs eyelet positions and spacing, while a center-back or side zipper requires its own placement and finishing instructions.
Pay particular attention to:
- Neckline shape and finished depth.
- Cup position and visible cup seams.
- Front and side bodice panel divisions.
- Waist seam and skirt attachment.
- Shoulder strap width and placement.
- Back opening and closure position.
- Hem shape and finished garment length.
If the dress has an asymmetrical neckline or a different construction on each side, draw that clearly. A symmetrical flat should not be used to represent an intentionally uneven design.
Internal Construction Drawing
If the bodice relies on internal support, include a separate inside view in the tech pack. The exterior drawing will not show the boning channels, reinforcement layers or waist stay, so these components need to be marked separately. An enlarged detail is useful where several layers meet at the neckline, cup or waist.
You can mark the approximate position of each boning channel, show the cup attachment and indicate where the lining connects to the bodice. A cross-section drawing is also useful when several layers meet at the neckline or waist.
When using a reference garment, add close-up photos of the inside and mark the boning channels against the corresponding panel seams. Also show where the lining stops, particularly around the neckline, waist and back opening. These details help the pattern maker understand how the original garment is assembled.
Detail Callouts
Use numbered callouts to connect specific instructions with the relevant part of the drawing.
For instance, you might mark the neckline finish as Detail 01, the cup attachment as Detail 02 and the back closure reinforcement as Detail 03. Add a short note explaining the required finish or reference material.
Keep the main flat clean enough to read. Put detailed sewing instructions, reinforcement requirements and finishing methods on a separate construction page, using numbered references to connect them with the drawing.
What Measurements Should You Include in a Corset Dress Tech Pack?
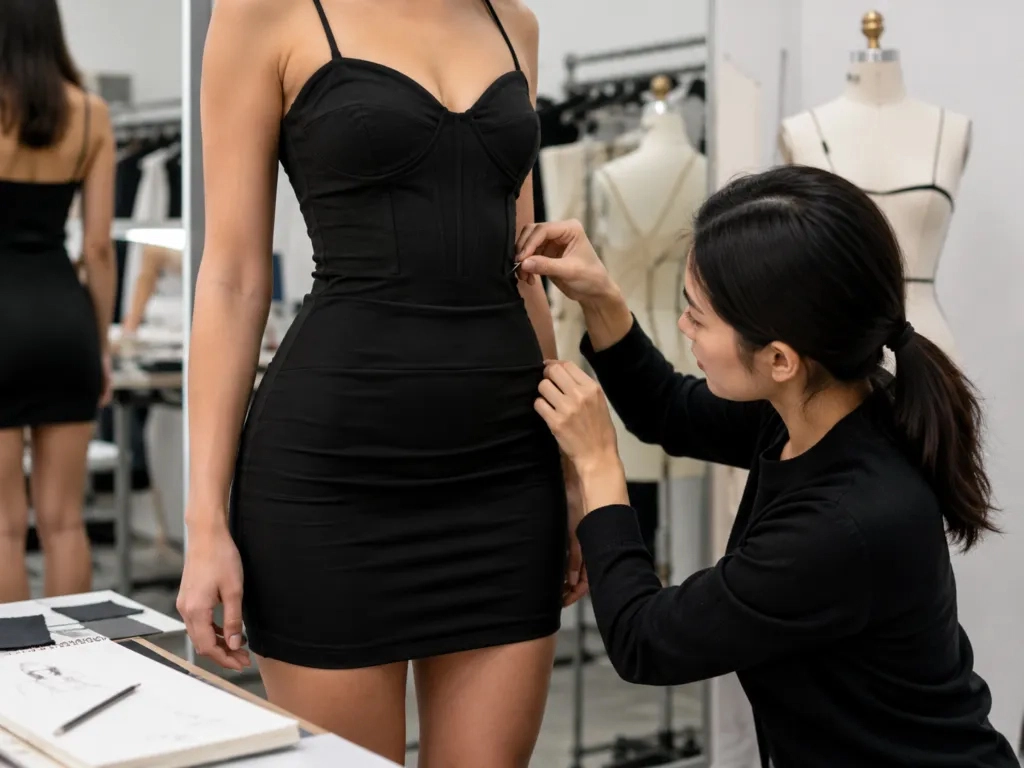
For corset dresses, the bust, waist and hip measurements only describe part of the fit. The cup area and upper bodice need additional measurement points, especially on styles with molded cups, low necklines or a closely fitted underbust.
List the base size, finished garment measurements and measuring method in the chart. Keep body measurements separate from garment measurements so the pattern maker can distinguish the intended body fit from the actual dimensions of the sample.
Important Corset Dress Measurements
The following points are commonly useful during development:
| Measurement | Production Purpose |
|---|---|
| Bust Circumference | Checks the overall bust fit |
| Underbust Circumference | Controls the fit below the cups |
| Waist Circumference | Defines the waist shaping |
| High Hip | Checks the lower bodice and upper skirt fit |
| Cup Depth | Helps establish cup volume and coverage |
| Bust Point to Bust Point | Defines the distance between cup positions |
| Shoulder to Bust Point | Helps locate the cups |
| Center Front Length | Controls front bodice proportion |
| Center Back Length | Checks back bodice balance |
| Skirt Length | Establishes the finished dress length |
Not every style needs all these points. A strapless corset dress, for example, needs careful attention to the upper edge because there are no shoulder straps to help keep the bodice in position.
A dress with molded cups may also need separate cup measurements or a reference cup shape. Simply providing the total bust circumference does not tell the pattern maker how much volume each cup should accommodate.
Define How Each Measurement Is Taken
Each Point of Measurement (POM) needs a clearly defined measuring method. Mark the points on the technical flat and state whether each measurement is taken flat or around the garment. Also identify the exact starting and ending positions so the sample room can follow the same method during measurement checks.
For example, Center Front Length should specify whether it starts from the top edge of the bodice or another reference seam. Cup Depth should also have a defined measuring method rather than relying on an informal description.
If you are developing a size range from XS to XXL, identify the base size first. The grading rules should then account for the garment’s actual structure. Increasing the bust and waist measurements by a fixed amount does not automatically maintain the correct cup position or bodice proportion across every size.
Set Measurement Tolerances
Your tech pack should state the acceptable measurement variation for the finished garment.
Use separate tolerance limits for measurements that affect fit in different ways. For example, the bust circumference and neckline width need closer attention on a fitted corset bodice than a general skirt length measurement. Agree on the acceptable variation before bulk production.
If you already have a fit-approved reference sample, use it alongside the measurement chart. The physical sample helps communicate the intended shape, while the written specifications provide measurements that can be checked during production.
How to Specify Boning and Internal Support
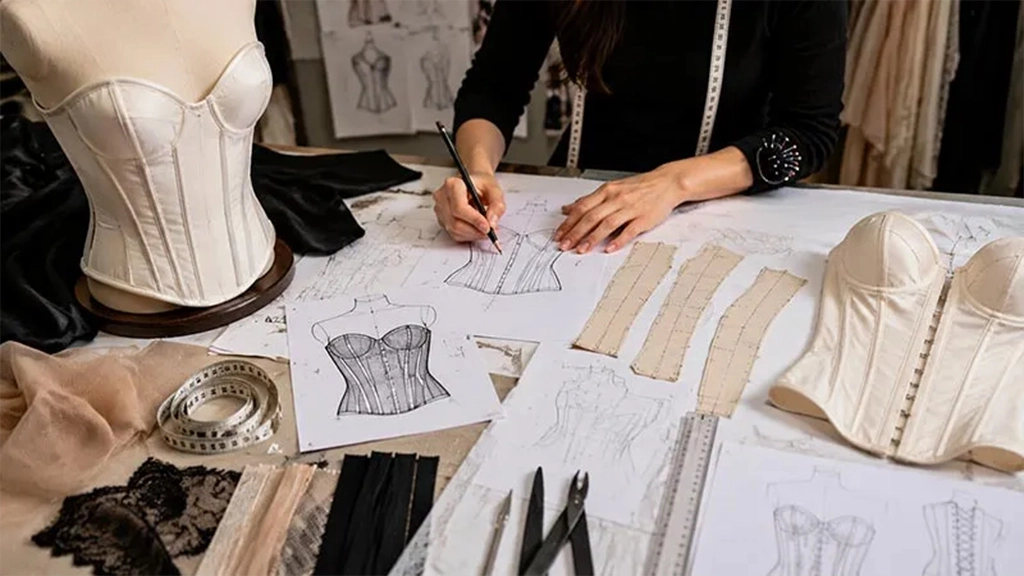
The internal structure is where a corset dress differs most from an ordinary fitted dress. Boning, lining, cups and reinforcement need to be considered as one construction system rather than separate items added after the pattern is finished.
Choose the Boning Type
Common options include plastic boning, spiral steel boning and flat steel boning. Their flexibility and support characteristics differ, so the choice should reflect the design and intended wear.
Your tech pack should identify the following where these details have been decided:
- Boning material and type.
- Position of each boning channel.
- Channel width and finished dimensions.
- Whether the channels follow panel seams.
- How the ends are finished.
- Any reinforcement required around the channels.
Inside photos of a reference corset are useful when you want to reproduce a particular level of support. They allow the pattern maker to examine the boning arrangement, channel width and internal layers before deciding how to develop the new pattern.
You do not need to specify an exact number of bones before the construction has been reviewed. Their placement depends on the bodice shape, panel arrangement, fabric and required support.
Explain the Other Support Layers
Even with the correct boning, the bodice may not hold its intended shape if the lining, reinforcement and panel construction are not suitable.
Depending on the design, the internal construction may include:
- Structured lining.
- Interlining or reinforcement fabric.
- Molded or padded cups.
- Built-in bust support.
- Waist stay.
- Reinforcement around the zipper or lace-up opening.
If the dress uses several layers, show their arrangement in the tech pack. This is particularly important when the outer fabric is lightweight or has little body.
For example, a soft satin outer layer may look correct in a flat sketch but may not hold the intended bodice shape without additional support. The lining and reinforcement need to be considered before the sample is made.
Check Boning Position During Sampling
During fitting, look at how the boning follows the body. A channel placed too close to a curved seam may create visible ridges.
The ends of the boning channels need to be secured and finished properly. Poorly positioned or exposed ends can press against the body, particularly around the waist when the wearer sits down.
During fitting, ask the wearer to sit, stand and move naturally. This helps reveal pressure points or channels that become noticeable only when the bodice is under tension.
How to Specify Fabric, Lining and Trims
When developing a corset dress, fabric choice needs to be checked against the bodice construction. A fabric that looks suitable in a reference photo may behave differently once it is cut into curved panels and sewn together with lining and reinforcement.
For a fitted corset bodice, fabric weight and surface characteristics can affect how cleanly the panels hold their shape. A material that works well for a loose skirt may not provide enough body for a structured upper section. Record the fabric reference and send a swatch whenever possible.
Main Fabric Information
For the outer fabric, provide:
- Fabric composition.
- Fabric weight (GSM).
- Color or Pantone reference.
- Fabric width, if known.
- Surface finish.
- Stretch and recovery, where applicable.
- Physical swatch or supplier reference.
A lightweight satin and a heavier satin may look similar in a photograph but behave differently around curved bodice panels. The difference becomes more noticeable when the fabric is fitted tightly or joined to several internal layers.
If you have already sourced your own fabric, send a swatch with the tech pack. If the manufacturer is sourcing it, provide a reference image, preferred composition and target fabric weight where possible.
Lining and Interfacing Specifications
Your material sheet should identify the lining separately from the outer fabric.
State whether the dress requires full lining, partial lining or a separate internal support layer. Include the lining composition and weight if they have been selected.
List reinforcement materials by location rather than describing them as one general layer. The neckline, cup area, center-back opening and waist may each need a different level of support.
One detail worth checking is stretch compatibility. If the outer fabric has some elasticity but the lining does not, the finished bodice may feel tighter than expected. The pattern and material choices need to be reviewed together.
Closures and Other Trims
The closure should be specified by type, position and relevant dimensions.
For a zipper, identify the intended length, placement and finish. For a lace-up back, show the eyelet positions, spacing and lacing arrangement. If hook-and-eye closures are included, indicate their location and quantity.
Other trims may include shoulder strap adjusters, decorative buttons, rhinestones, beading or embroidery.
If your design uses decorative elements around the neckline or waist, provide their size and placement. A reference photo is useful, but a measurement from a defined seam or edge makes the instruction easier to follow.
What Construction Details Should You Include?
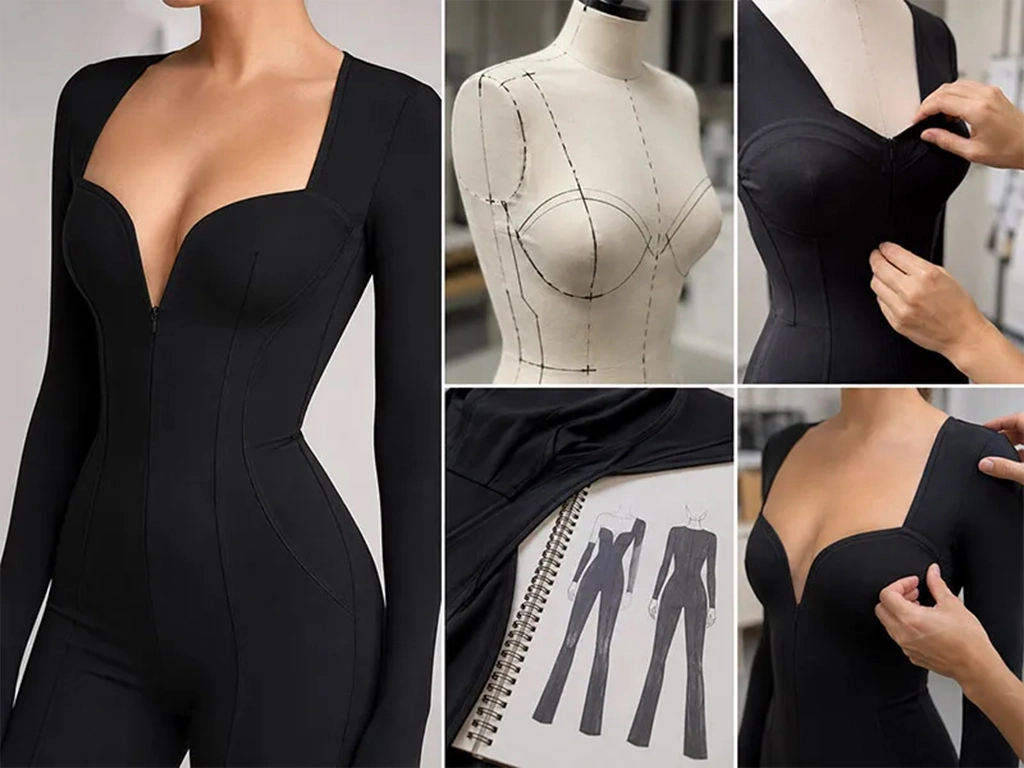
A tech pack needs to explain how the different parts of the garment are joined. This is particularly important for corset dresses because the bodice often contains several layers and curved seams.
Bodice Panels and Seam Construction
Identify each bodice panel and mark the seams responsible for shaping the bust and waist. Princess seams, side panels and curved front seams should be easy to distinguish on the technical flat.
If your design uses princess seams, make sure the drawing shows where they begin and end. If the panels have different widths or curved edges, add a close-up drawing where necessary.
Seam allowance requirements should be stated when they have already been established. If the pattern maker will determine them during development, leave them open for technical review rather than inserting arbitrary measurements.
Cup Attachment and Neckline Finish
Describe the cup construction and how the cups connect to the bodice.
For molded or padded cups, provide a reference shape, size and position if available. For fabric-formed cups, show the seam lines and intended volume.
The neckline finish also needs to be clear. Binding, facing and a clean-finished lining edge produce different results. This matters particularly for strapless dresses, where the upper edge is visible and needs to stay in position.
Closure Reinforcement
The back closure needs to withstand tension from the fitted bodice. Show its position in relation to the bodice panels and lining, and mark any additional reinforcement required.
For lace-up styles, specify the eyelet positions, spacing and reinforcement around the opening. For zipper styles, check that the surrounding layers remain flat and do not create excessive bulk that could interfere with fastening.
Waist Seam and Skirt Attachment
If your corset bodice connects to a full skirt, explain how the two sections are joined.
Specify whether the skirt is gathered, pleated or attached with a relatively smooth waist seam. If the skirt is heavy, the attachment area may need additional attention so that the bodice does not lose its intended shape.
The lining attachment should also be shown. Otherwise, the outside may look correct while the inside has unnecessary bulk or an unfinished transition.
Common Tech Pack Mistakes That Can Delay Corset Dress Sampling
Some missing details do not become obvious until the first sample is on the fitting model. By then, the sample room may have already spent time adjusting the cup shape, bodice panels or internal support. Reviewing these points before pattern development can reduce avoidable corrections.
| Missing or Unclear Information | What May Happen During Development |
|---|---|
| No internal construction drawing | The factory has to clarify how the bodice is supported |
| Cup position without cup specifications | Bust shape and coverage may differ from the reference |
| Boning shown without channel details | The internal structure may need adjustment |
| Fabric listed by name only | Material selection may not match the intended stiffness |
| No lining coverage information | The inside construction may need to be revised |
| Unclear back closure instructions | Zipper or lace-up placement may affect fit |
| Different measurement versions | The pattern and sample team may follow different specifications |
One common problem is updating the sketch without changing the measurement chart. If the neckline is lowered or the cup position changes after the first fitting, both documents need to carry the same revision number.
When sending fit comments, mark the affected area on a sample photo and describe what needs to change. For example, instead of writing “reduce the upper bust,” specify whether the issue is neckline gaping, excess cup volume or the position of the upper edge. Where possible, link the comment to the relevant POM or construction detail.
How Does a Clothing Manufacturer Use Your Tech Pack?
For a corset dress, pattern development often starts with a closer review of the bodice than the skirt. The cup shape, panel arrangement and internal support need to be understood before the pattern maker can establish the first construction.
The development process usually moves through these stages:
1. Tech Pack Review
Your specifications are checked for missing measurements, unclear construction details and material requirements that need confirmation.
2. Pattern Development
The pattern maker develops the bodice and skirt patterns. Cup positioning, panel shaping, waist fit and fabric properties are considered together.
3. Sample Making
The sample room makes the first garment using the agreed materials and construction method. The inside of the bodice is checked as carefully as the outside.
4. Fit Correction
You review the sample and provide comments on bust fit, cup position, waist shaping, neckline balance and closure performance. Changes are recorded against the relevant measurements or construction details.
5. PP Sample Approval
After the necessary corrections, the pre-production sample is reviewed against the final specifications. The approved sample, pattern, materials and construction details become the reference for bulk production.
Before bulk cutting begins, check that all corrections made during sampling have been transferred to the final tech pack. The approved PP sample, updated pattern and production specifications should all reflect the same construction details.
Frequently Asked Questions
1. Can I send my corset dress design to a manufacturer before the pattern is ready?
Yes. You can start with a sketch, reference garment or clear product photos. A finished pattern is not necessary for an initial development review. What matters is explaining the intended silhouette, target fit and any construction details you already know.
2. What if I want to keep my corset dress design confidential?
Before sharing proprietary patterns or detailed construction files, discuss confidentiality requirements with your manufacturing partner. Keep dated copies of your original drawings and approved documents. You should also clarify who can access the files and how design information will be handled.
3. Should I prepare separate tech packs for different colorways?
Not necessarily. You can keep several colorways in one tech pack if the construction and measurements remain the same. List the fabric, lining and trim colors separately for each option. If a colorway uses a different material or finish, identify that change clearly.
4. Can a manufacturer help me reduce the cost of a complicated corset dress?
Yes. The factory can review whether the number of bodice panels, lining layers, boning arrangement or decorative techniques can be adjusted. For example, a simpler panel layout may reduce sewing operations, while a different trim application may lower labor time. Any change should be checked on a sample first to make sure it does not weaken the bodice support or alter the intended fit.
5. What should I do if my approved sample and bulk production garment look different?
Start by comparing the bulk garments with the approved PP sample, particularly around the bust, cup position, waist and neckline. Check the fabric, pattern version, boning placement and finished measurements. If the difference affects fit, document the affected area with photos and measurement records so the factory can trace the issue to the relevant production stage.
Conclusion
For a corset dress, the first sample needs to confirm more than the outside silhouette. Cup position, panel shaping, boning channels and lining construction all need to work together before the style is ready for bulk production. Recording these decisions in the tech pack makes later fit corrections and production checks easier to follow.
You do not need to have every technical decision finalized before starting, but confirmed details and open questions should be clearly separated. If you are developing a new corset style, an experienced dress manufacturer can help review the construction before sampling.
At Xiuyu Apparel, our pattern department reviews bodice construction, cup positioning and internal support before sample development. If you are preparing a corset dress collection, send us your sketches, reference photos or existing tech pack. Our team can review the information and identify details that may need clarification before sampling.