

A satin dress may look straightforward in a sketch, but getting the sample to hang correctly can take several rounds of adjustment. Before our pattern department starts work, we need to know more than the intended look. Fabric weight, grain direction, lining coverage, finished measurements, and seam details all influence the pattern. When these points are clear from the start, the first sample gives you a more useful basis for fit and construction decisions.
What Should a Satin Dress Tech Pack Include?
Before requesting a sample, prepare the information your factory will need for pattern development, material sourcing, and garment construction. The exact details vary by style, but the following items provide a practical starting point.
For a satin dress, prepare:
- Front and back technical flats
- Close-up drawings of unusual construction details
- A garment measurement chart and size range
- Main fabric and lining specifications
- Seam, stitch, hem, and closure requirements
- Trims such as zippers, straps, cups, or elastic
- Color references and artwork, if applicable
- Label, hangtag, and packaging details
- Sample comments and revision history
A short tech pack can work well for a simple slip dress. What matters is whether the pattern maker can identify the intended shape, measurements, materials, and construction without having to fill in important gaps.
For example, a sketch may show a low-back satin slip dress, but it may not explain the strap attachment, zipper length, or lining coverage. Without those details, the sample room may produce a wearable dress with the wrong strap position, zipper length, or back opening. The garment can be well sewn and still differ from the design your team intended to approve.
1. Prepare Technical Drawings for Your Satin Dress
Show the Front, Back, and Important Details
Front and back technical flats give the factory a clearer view of the garment than a fashion illustration alone. They should show seam positions and construction features that may be hidden by the styling or pose of the original drawing. Your technical drawing should show the neckline, darts, waist seam, straps, side seams, closure, skirt shape, and hem.
Focus on details that affect both the shape and the visible finish. For a cowl neckline, show the intended drape and depth. For narrow straps, mark the finished width and attachment points. A low-back design also needs clear measurements for the opening and enough construction detail to explain how the back will stay in place.
If the dress includes a slit, mark its position and finished height. If the zipper should be concealed, identify its location rather than relying on the illustration alone.
Use Close-Up Views for Difficult Construction
Add detail drawings where the main flats leave room for interpretation. Useful examples include:
- Strap attachment at the back neckline
- Invisible zipper and hook-and-eye placement
- Bodice lining and neckline finishing
- Cup or support placement
- Slit opening and hem construction
Close-up drawings are most useful where a construction choice changes the fit or visible finish, such as strap attachment, neckline lining, or concealed zipper placement. Ordinary seams that are already clear in the main flats do not need separate illustrations.
2. Specify the Satin Fabric Before Sampling
Record the Fabric Properties
When a tech pack lists only “satin,” the factory still has to determine which material the design requires. Silk, polyester, and stretch satin can behave quite differently in cutting and sewing, even when their surface appearance is similar.
Include the following details in the fabric specification:
| Specification | What to include |
|---|---|
| Composition | Silk, polyester, viscose, or blended fibers |
| Weight | GSM or supplier’s fabric specification |
| Width | Usable fabric width |
| Finish | Matte, glossy, washed, or other specified finish |
| Stretch | Stretch direction and recovery, where relevant |
| Color | Pantone reference, approved swatch, or supplier code |
| Fabric reference | Supplier, article number, or swatch identification |
If you have already selected the fabric, attach a swatch or provide a reliable reference. If you need the factory to source it, describe the finish, weight, opacity, and drape you expect.
When comparing factory quotations, check whether the proposed satin fabrics are genuinely comparable. Two swatches can look similar in a product photo, yet produce different results in the finished dress. Lightweight satin may reveal seam impressions more readily, while a heavier fabric can change the fall of a bias-cut skirt.
Identify Bias-Cut Construction
For a bias-cut satin dress, mark the grain direction on the technical drawing or pattern notes. Because the fabric can stretch and settle differently on the bias, check the sample for twisted side seams and uneven hem levels. Allow the garment to hang before final hem adjustments when the fabric and construction require it; the settling time should be determined by the material rather than assumed to be the same for every style.
Confirm Fabric Changes Before Approving the Sample
A fabric change after pattern development may require more than a material substitution. Differences in weight, stretch, or drape can alter the neckline, skirt fit, and seam appearance, so the revised fabric should be reviewed before the sample is approved.
When two fabrics are under consideration, identify both before sampling. The pattern maker can then assess whether the same pattern and construction are suitable for each option, or whether one fabric is likely to need additional adjustment.
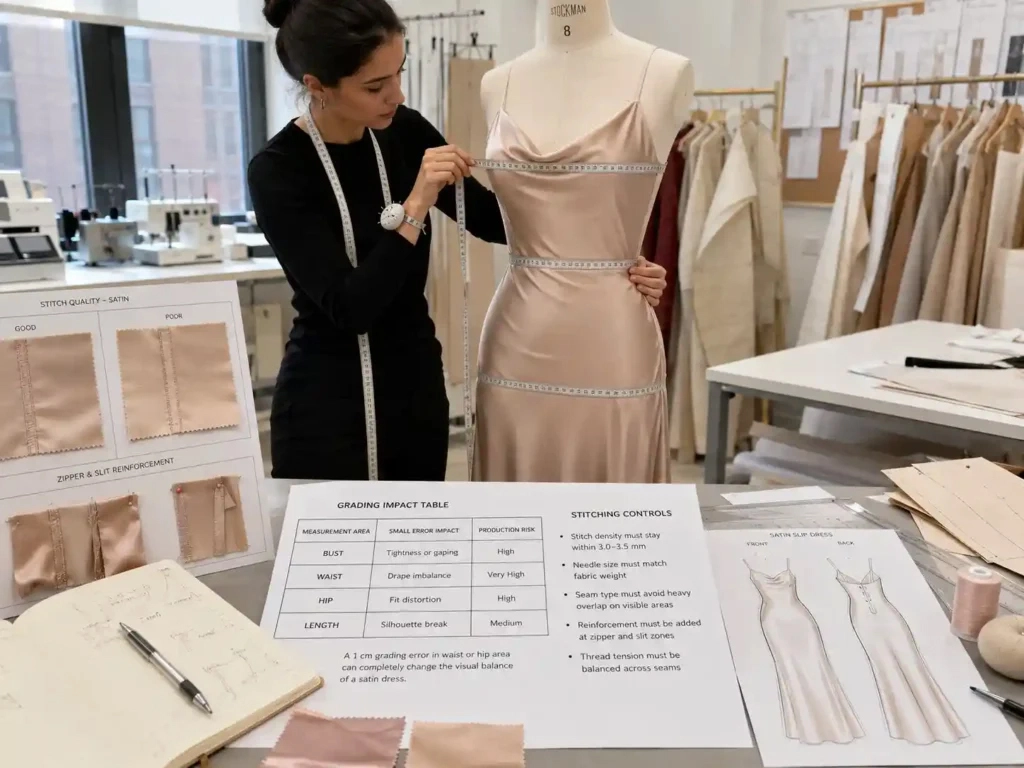
3. Build a Measurement Chart That the Factory Can Follow
List finished garment measurements alongside the measuring points used to obtain them. For example, “dress length” can mean high-point-shoulder to hem or waist seam to hem. Unless the tech pack defines the starting point, the designer, buyer, and pattern maker may be working to different measurements.
Depending on the silhouette, your satin dress chart may include:
- Bust circumference
- Waist circumference
- Hip circumference
- Shoulder width, if applicable
- Front and back neckline depth
- Strap length and width
- Armhole depth, if applicable
- Finished dress length
- Slit height, if applicable
A fitted evening dress may need additional measurements around the bodice and hip. A loose slip dress may need more attention to neckline placement, strap position, and overall length.
Define the Measuring Points
Mark the measuring points directly on the technical flat, including neckline depth, strap length, armhole depth, and slit height where applicable. Use the same measurement definitions throughout the size chart so the designer, pattern maker, and quality team can check the garment consistently.
Also distinguish body measurements from finished garment measurements. A finished bust measurement includes the ease and shaping built into the garment; it should not be treated as the wearer’s body measurement.
Set Tolerances and Grading Rules
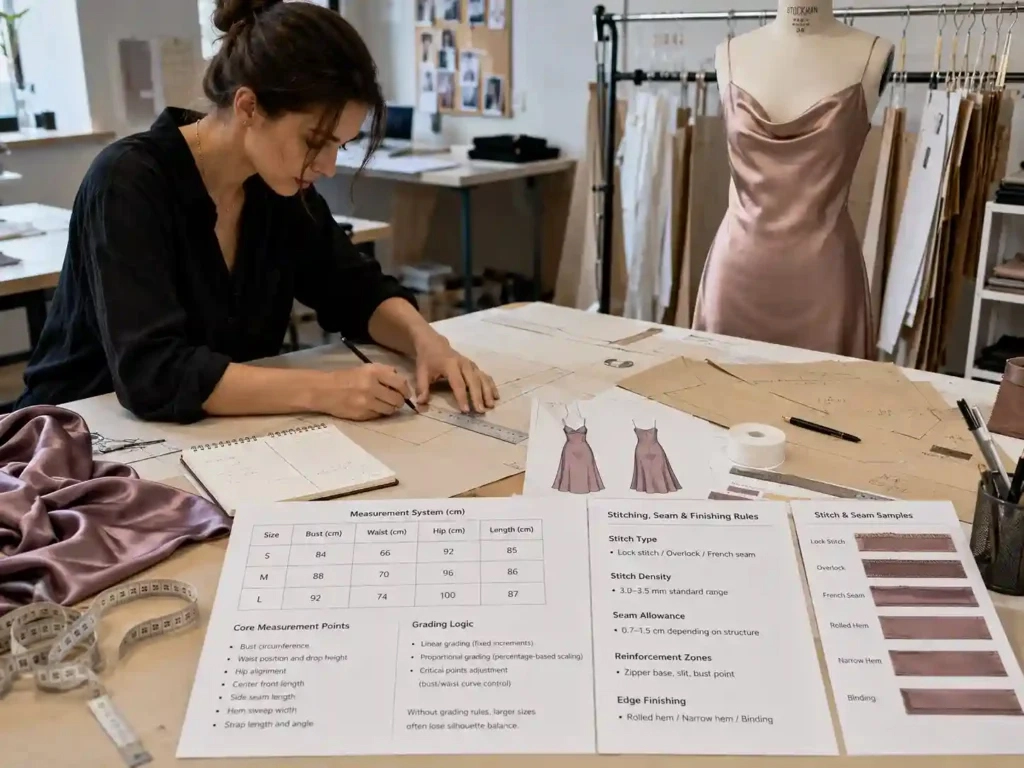
Include acceptable measurement tolerances and the intended size range. If you need XS–XXL or a custom size set, provide the grading rules rather than assuming every measurement should increase by the same amount.
On a fitted satin dress, check bust, waist, and hip measurements together rather than approving each point in isolation. Excess ease can soften the intended silhouette, while insufficient ease may pull across the body and distort the seams. Review the finished measurements against the intended fit and the selected fabric.
4. Explain the Construction Details Clearly
Neckline, Straps, and Bodice
Document the neckline shape, strap position, dart placement, and finishing method. For styles with cups, elastic, or internal support, include their positions in the technical drawing or construction notes so the sample room can follow the intended design.
For a cowl neckline, a reference image alone may not explain the intended depth and drape. Add a close-up or construction note. For a fitted bodice, show the dart and seam positions so the sample room can develop the shape without guessing.
Under direct light, a twisted strap, puckered dart, or wavy neckline can be particularly noticeable on satin. These areas deserve close inspection during sample review, especially on styles with narrow straps or a clean, unlined neckline.
Seams, Zippers, and Stitching
List the important seams and closures, including side seams, center-back seams, invisible zippers, hooks and eyes, and any required concealed finishing.
Describe the required finish in measurable or visible terms. For example, note whether topstitching should be visible and identify the position and finish of an invisible zipper. The sample room can then check the result against the specification instead of interpreting “neat stitching” differently from the designer.
The construction method should suit the chosen fabric. A technique that works on a stable woven fabric may produce puckering or tension on a lightweight satin. Sampling is where the factory checks whether the proposed construction works with the actual material.
Hem and Slit Finishing
State the required hem finish when it affects the look or construction of the dress. A narrow turned hem may suit one satin, while another may require a different finish to avoid bulk or an uneven edge.
For a slit, record the finished height and location. On long or bias-cut dresses, inspect the hem after the garment has settled as appropriate for the fabric. Final length should be checked on the sample rather than estimated only from the original sketch.
5. Prepare a Bill of Materials for Fabric and Trims
Your bill of materials (BOM) records the components needed to make the dress. It may be included in the tech pack or maintained as a separate sheet linked to the same style number and revision.
| Component | Information to record |
|---|---|
| Main fabric | Composition, weight, width, color, reference |
| Lining | Material, color, coverage, stretch requirements |
| Zipper | Type, length, color, finish |
| Straps or elastic | Width, material, color, placement |
| Cups or support components | Type and position, if required |
| Thread | Color and special requirements |
| Labels and hangtags | Artwork and placement |
| Packaging | Folding, polybag, barcode, carton requirements |
Only include components that apply to your design. If you allow the factory to source alternatives, define what must remain unchanged. For example, a different zipper supplier may be acceptable, but the zipper color and concealed appearance may still need to match the approved sample.
Update the BOM whenever a material is changed. For example, if the sample is made with one lining but bulk production will use another, record the replacement material and obtain approval before production starts. Purchasing and the production team should be able to identify the same confirmed components from the current document.
6. Record Colorways, Artwork, and Special Requirements
List each colorway with its Pantone reference, approved swatch, or supplier color code. Pantone provides a useful target, but the finished satin should also be checked against the approved reference. Its sheen can make the same color appear different under changing light.
For printed or embellished satin, attach the artwork and specify placement, scale, and alignment. If a motif needs to sit at the center front or match across a seam, mark that before cutting begins.
You should also record any special handling requirements. Satin can develop snags or pressure marks during sewing, pressing, and packing. For fabrics with a delicate surface, note any handling restrictions before sampling and check the finished garment for marks that remain visible after pressing.
For private-label orders, confirm label placement, hangtags, barcodes, folding, and packaging before bulk production. These details may not change the silhouette, but they still affect the finished order.
7. Review the First Sample and Record Corrections
Review the sample while standing and moving, checking the neckline, bust, waist, hip, side seams, zipper, lining, and hem against the tech pack. Under consistent lighting, look for puckering, pulling, visible seam impressions, and changes in the fabric’s appearance. These checks help identify issues that may not be obvious from a flat drawing.
Sample comments should identify the location and the required correction. For example, replace “the dress is too long” with “reduce the finished length by 2 cm, measured from the high point shoulder.” For a neckline correction, mark the affected area and specify whether the depth, width, or shape needs to change.
Record each approved correction against the relevant tech pack revision. Update the affected drawing, measurement chart, BOM, or construction note, then make sure the pattern department and sample room receive the revised file. Keep the previous version identifiable so outdated instructions are not mistaken for the current specification.
8. Check the Final Specification Before Bulk Production
Before bulk cutting begins, check the approved pre-production (PP) sample against the current tech pack and confirmed material references. Pay particular attention to any changes made during sampling, including revised measurements, lining, zipper details, and hem construction.
Before releasing the order to bulk production, confirm that:
- The PP sample matches the latest approved measurements and construction details.
- Main fabric, lining, and trims match the confirmed material references.
- All sample corrections have been incorporated into the current tech pack.
- Colorways, artwork, labels, and packaging have been approved.
- Any material or construction changes have been reviewed before production proceeds.
For satin dresses, final approval should cover seam appearance, pressing, hem balance, and overall drape as well as measurements. If the approved fabric, lining, or construction changes, review the impact before bulk cutting begins.
FAQ
Can you develop a satin dress if you only have a sketch and reference photos?
Yes. A sketch and reference photos are a reasonable starting point, particularly during the initial quotation discussion. Before sample development, the factory will need to confirm the intended measurements, fabric properties, construction details, and fit. Missing information can be clarified as the design develops, but important decisions should be agreed before the sample is made.
How should you compare quotations when factories suggest different satin fabrics?
Start by comparing composition, fabric weight, width, finish, and lining requirements. Ask each factory to identify its proposed fabric by supplier reference or swatch. A lower quotation may reflect a different material specification, so confirm that both offers cover the same product requirements before comparing costs.
What if your target price does not match the design you want?
If the quotation exceeds your target price, ask the factory to identify the main cost drivers before changing the design. Fabric composition, lining coverage, embellishments, construction details, and order quantity can all affect the cost. You can then compare possible adjustments and decide which changes will reduce the price without compromising the features most important to your collection.
How can you prevent different teams from using outdated specifications?
Assign a style number and revision date to the tech pack, then keep approved drawings, BOM details, measurement charts, and sample comments together. When a change is accepted, replace or clearly mark the previous version. Confirm that the factory’s pattern, sampling, and production teams have the same approved file.
What should you do if the approved sample looks different under retail lighting?
Check the fabric and garment under consistent lighting before deciding what needs to change. Satin’s sheen can make color and surface appearance look different across environments. If the difference is unacceptable, document the lighting conditions and compare the garment with the approved fabric swatch before agreeing on corrective action.
Conclusion
A useful satin dress tech pack connects your design with the details needed for sampling and bulk production. Fabric behavior, grain direction, measurements, construction, and finishing should be reviewed together, not as separate notes. Keep revisions tied to one approved specification and use the physical sample to confirm what drawings cannot show. If you are preparing a dress for production, you can learn more about Xiuyu Apparel and our dress manufacturer services.