

When you send a maxi dress design to a clothing manufacturer, a sketch can show the look you want, but it cannot settle every production detail. The finished length, skirt fullness, fabric drape, lining coverage, and slit position all affect the sample. We check these points before pattern making because unclear specifications often lead to avoidable revisions. Before the first sample is made, the tech pack should tell the pattern maker what needs to be measured, how the dress is constructed, and which details still need your approval.
What Should You Include in a Maxi Dress Tech Pack?
For a maxi dress, start with the information that affects the pattern and the finished fit: technical drawings, finished measurements, fabric and lining details, and construction notes. You can leave material choices or design decisions open, provided they are clearly marked for confirmation.
For a typical maxi dress, prepare:
- Front and back technical flats, plus close-up views of unusual details
- A measurement chart with clearly defined points of measurement (POMs)
- A bill of materials (BOM) for the main fabric, lining, trims, and labels
- Fabric specifications, including composition, weight, width, and relevant performance requirements
- Construction notes for seams, hems, closures, slits, and decorative details
- Colorway references and print placement, if applicable
- Label, hangtag, and packaging instructions
- A revision date and version number for the current file
If the fabric, lining, or final slit length is still under discussion, mark it as pending in the tech pack. The factory can then separate the confirmed specifications from the decisions that still need to be made before sampling.
For example, if you know you want a lightweight, fluid skirt but have not selected the fabric, describe the intended drape and opacity. The factory can then discuss suitable options before the material is confirmed. This is more useful than listing a fabric name simply because it looks similar to the reference photo.
1. Prepare Technical Drawings That Show the Construction
Start with front and back technical flats, then add close-up views wherever the drawing leaves room for interpretation. On a maxi dress, that often means the back closure, slit opening, strap attachment, or the point where a gathered skirt joins the bodice.
For a maxi dress, check whether the drawings identify:
- Neckline shape and depth
- Strap width, placement, and adjustment details
- Bodice seams and waistline position
- Skirt panels, gathers, pleats, or tiers
- Zipper location and closure type
- Slit position and opening length
- Pocket openings, if included
- Lining coverage and hem finish
Consider a dress with a fitted bodice and a full skirt. A sketch may show the intended silhouette, but it does not tell the pattern maker whether the fullness comes from gathered fabric, shaped panels, or a circular skirt.
These options affect both the skirt’s appearance and its construction. Gathering concentrates fullness at the joining seam, shaped panels distribute volume through the skirt, and a circular cut changes the drape and fabric requirements.
For a side slit, mark both its position and finished opening length. If it begins at a waist seam or panel seam, use that seam as the reference point so the pattern maker does not have to estimate the starting position from the illustration.
You should also distinguish design references from construction requirements. A reference photo might show the neckline you like, while a separate drawing shows the back closure you want to use. Label each reference so the factory knows which details to follow.
Before sending the file, compare the drawings with your written notes. If the front view shows a center-back zipper but the construction page specifies a side zipper, correct the mismatch first. Small contradictions are easy to miss on screen and can create unnecessary work once sampling starts.
2. Create a Measurement Chart for Your Maxi Dress
Your measurement chart should state the finished garment dimensions and explain how each point is measured. A list of numbers without measuring instructions can cause problems, especially when your designer, technical designer, and factory use different measuring conventions.
The chart should reflect the particular silhouette rather than copying a generic dress template.
| Measurement | What your specification should clarify |
|---|---|
| Body length | Starting point and finished hem position |
| Bust | Measurement line and method |
| Waist | Waistline position and measuring method |
| Hip | Measurement level, where relevant |
| Sweep | Total circumference at the finished hem |
| Strap length | Attachment points and whether adjustment is included |
| Armhole | Measuring method for the applicable design |
| Slit length | Starting point and finished opening length |
Choose measurements according to the silhouette. An empire-waist dress needs a clearly defined under-bust or raised waist position, while a fitted knit dress needs measurements that account for stretch and recovery. For a bias-cut slip dress, length and garment balance deserve particular attention because the fabric may relax after cutting.
Define the Finished Length Before Sampling
For a floor-length maxi dress, agree on the length measurement before sampling. A few centimetres can change how the hem sits with the intended shoes, particularly on a fitted or narrow silhouette.
For a dress with shoulder straps, the measurement may run from high point shoulder (HPS) to the finished hem, provided this matches your brand’s measurement method. For a strapless style, use the top edge of the bodice or another agreed reference point. Apply the same method when measuring the sample and recording corrections.
Also explain whether the measurement is taken on the finished garment and how the waist seam or waistband is treated. Writing only “full length” leaves too much open to interpretation.
If the dress is designed to skim the floor, tell the factory the intended wearing length and, where relevant, the shoe height used for fitting. The factory can work to the approved measurements, but the final appearance also depends on the wearer’s proportions and styling.
Separate Size Grading From Measurement Tolerance
Your base size is the starting point for developing the remaining sizes. The tech pack should identify the base size and provide grading rules or an approved size chart.
Keep grading and measurement tolerance in separate columns or sections. Grading sets the measurement changes between sizes; tolerance sets the acceptable variation when a finished garment is measured against its specification.
Do not assume that length, bust, waist, and hip should all increase by the same amount between sizes. Those changes need to reflect your brand’s fit block and the silhouette you want to maintain.
If you already have an approved size chart, send it with the tech pack. If this is your first collection, discuss the base size and grading approach with the pattern team before approving the sample. This is easier to resolve early than after the design has been graded for bulk production.
3. Specify the Main Fabric and Lining Separately
When you specify satin, chiffon, crepe, or viscose, include a quality reference or fabric swatch wherever possible. Two fabrics sold under the same name can behave differently in cutting and sewing, and those differences may affect the skirt’s drape, opacity, and finished weight.
Include the information available for your selected fabric:
- Fiber composition and fabric quality reference
- Weight in GSM, where available
- Usable fabric width
- Color reference or approved swatch
- Stretch and recovery, if relevant
- Shrinkage requirements
- Transparency and drape expectations
- Print direction or placement restrictions
If you have a physical swatch, identify it so the team can connect the reference to the correct style. If the fabric has not been selected, describe what you need from it instead of treating an unconfirmed quality as final.
Consider Drape, Fabric Width, and Cutting
The same skirt pattern can behave differently in fabrics with different weights and stiffness. A lightweight chiffon may need more support or lining, while a heavier satin can place more weight on the waist seam and create a different fall.
Bias-cut styles need particular attention. Fabric cut on the bias can stretch or relax differently from fabric cut on the straight grain. Depending on the material and design, the garment may need time to relax before its length and hem are finalized.
Check usable fabric width when developing a full maxi skirt. If the pattern pieces do not fit efficiently across the fabric, the marker may need extra panels or a different layout. That can change seam positions and fabric consumption, so the skirt’s volume should be reviewed alongside the fabric choice rather than after it.
If you are working toward a target unit cost, discuss the silhouette and fabric together. A fabric that looks right in a small swatch may not be the most practical choice for the required skirt volume.
Document the Lining and Slit Arrangement
If your maxi dress has lining, specify its fabric, color, coverage, and attachment method where these details are known.
Clarify where the lining ends. It may stop above the outer hem, follow most of the skirt length, or cover the full skirt. For a dress with a slit, the lining must also be arranged so it does not show unintentionally or restrict the opening.
Compare the lining with the outer fabric for stretch, length, and slit position. If the lining has less give or ends at the wrong point, it may pull across the hips, restrict the slit opening, or show below the outer skirt when the wearer walks.
If the lining arrangement is difficult to explain in writing, add a small drawing showing the lining hem and slit. A clear diagram is often more useful than a long paragraph describing the same detail.

4. Write Construction Notes for Details That Affect the Result
Use construction notes for details that cannot be understood from the technical flats or measurement chart alone. Record the requirements that affect the finished appearance, fit, or workmanship.
- Seam type and seam finish
- Hem allowance and finishing method
- Zipper type and placement
- Waist seam construction
- Gathering or pleating method
- Slit reinforcement and finishing
- Strap adjustment or closure details
- Lining attachment
- Decorative trims or special workmanship
You do not need to describe every ordinary sewing operation in detail. Concentrate on the parts that make your design different or that must match an approved reference.
For example, “narrow hem” may not be specific enough if the hem appearance is important. Add a close-up reference or state the required finish. For a tiered skirt, mark the joining lines and clarify how the fullness should be distributed. For a concealed zipper, identify its location and any important finishing requirements.
If you are using a reference garment, state which details should be followed and which are only for inspiration. A photo can show the overall look, but it may not reveal the internal construction or the method used to finish the seams.
The purpose of these notes is to remove decisions that should already have been made by the design team. Where a construction choice is still open, mark it for discussion before the sample is approved.
5. Complete the Bill of Materials and Colorway Details
The bill of materials identifies the components required to make your dress. It connects the design to the materials that need to be sourced and used during production.
A typical BOM may include:
| Component | Details to record |
|---|---|
| Main fabric | Quality reference, composition, weight, and color |
| Lining | Fabric reference, color, and coverage |
| Zipper | Type, length, color, and location |
| Thread | Color or special requirements |
| Elastic or interfacing | Type and application, if used |
| Decorative trims | Dimensions, color, material, and placement |
| Main label | Artwork, dimensions, and position |
| Care label | Required information and attachment location |
| Hangtag and packaging | Artwork and packing instructions |
A cotton day dress may use one main fabric, a zipper, thread, and labels. An embellished evening maxi dress may also need separate entries for beads, appliqués, backing materials, and the exact placement of each trim. List each component that needs to be sourced, approved, or checked during production.
If you plan to offer multiple colorways, identify each one separately. Do not assume every component changes with the main fabric color. The zipper, thread, lining, and labels may need their own color instructions.
When a material is not yet confirmed, mark it as pending. If you change the shell fabric after sampling, update the BOM and review whether the lining, thread, and construction notes also need to change. An old material specification can lead to a quotation or sample that no longer matches your current design.
6. Record Special Requirements Before Bulk Production
Add a separate section for requirements that need to be followed during cutting, sewing, or inspection. Examples include fabric relaxation before hemming, print matching across skirt panels, directional cutting, and handling instructions for delicate materials.
For a fluid maxi dress, the hem may not remain even if the fabric relaxes after cutting or hanging. This is worth discussing during development, especially for certain bias-cut designs. The appropriate handling method depends on the fabric and the construction, so avoid applying one rule to every style.
If the print must match across panels, show the direction and identify the areas where matching matters. If the design is asymmetric, label the left and right panels clearly. These instructions are particularly useful when the garment has several skirt sections or a large print.
Avoid vague instructions such as “premium quality” or “perfect finishing.” They do not tell the production team what to check. A measurable requirement, approved reference, or clearly illustrated detail gives the team something specific to follow.
If your brand has special inspection requirements, identify the critical points before bulk production. That allows the factory to understand which details need particular attention and how the finished garment should be checked against the approved sample.
7. Check the Tech Pack Before Sending It to the Factory
Before sending the file for sampling, review the complete document as one specification. The drawing, measurement chart, BOM, and construction notes should describe the same version of the dress.
Use this checklist:
- The front and back flats match the written construction notes.
- The length measurement has a defined starting point.
- Important measurements include clear measuring methods.
- The base size and grading information are consistent.
- Fabric and lining specifications match the intended design.
- The zipper, slit, straps, and trims are clearly identified.
- Colorways and artwork references are correct.
- Unconfirmed details are marked as pending.
- The revision date and version number are current.
Pay particular attention to changes made after a sample fitting. If you move the slit, change the fabric, or adjust the bodice, update the affected pages rather than sending a revised sketch with an outdated measurement chart.
After a fitting, update the affected measurements, drawings, and construction notes together. Keep the revision number and date visible on the file so the sample room and production team can identify the latest approved specification without comparing several versions manually.
If something is unclear, ask the factory to identify the specific question before cutting begins. A short clarification at this stage is usually easier to manage than correcting a sample made to a different interpretation.
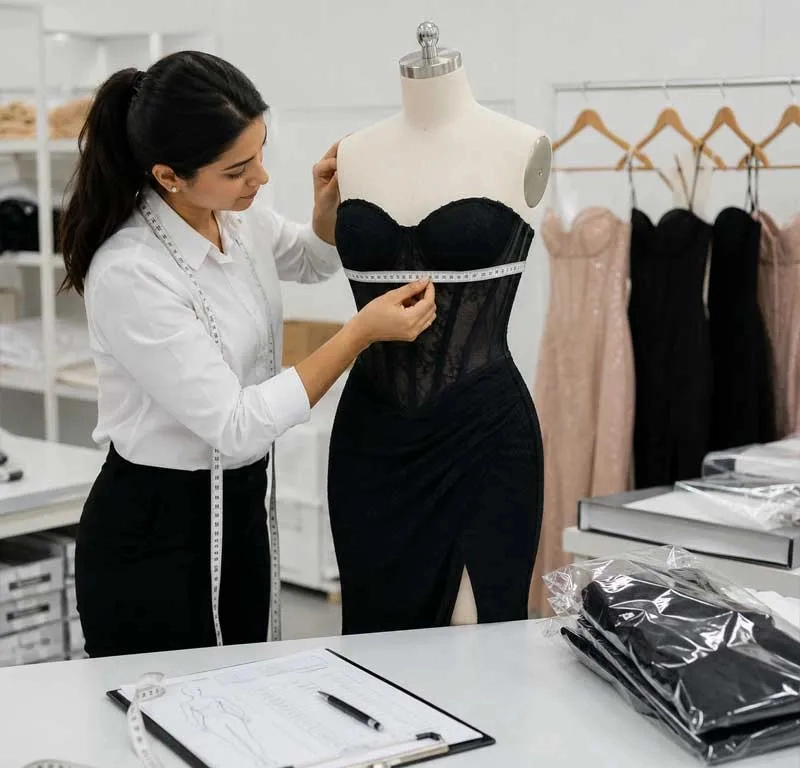
8. What If You Do Not Have a Complete Tech Pack?
You can start a development discussion with a sketch or reference garment even if the tech pack is incomplete. Include the intended silhouette, approximate length, estimated quantity, and delivery target, then list the unresolved decisions, such as fabric selection, lining coverage, or the base-size chart.
The factory can review the information and flag missing decisions. For example, the team may need to confirm the base-size measurements, lining coverage, slit length, or skirt fullness before preparing the first sample.
Keep estimates separate from approved specifications. If you are still choosing between two fabrics or deciding whether the skirt should be lined to the hem, say so. This gives both sides a clear list of open questions.
A tech pack is useful because it records decisions in a form that the development and production teams can follow. Its value does not come from the number of pages. A shorter, consistent document is more useful than a detailed file containing conflicting measurements or outdated instructions.
FAQs
1. Who should be responsible for approving the final tech pack?
The person approving the tech pack should have authority to sign off on fit, measurements, materials, and construction. Designers and buyers can still provide input, but their comments should be consolidated before the factory receives the next revision. Otherwise, a change agreed during a fitting may not make it into the measurement chart or construction notes.
2. What happens if the fabric selected for the sample is unavailable for bulk production?
Request a swatch of the proposed replacement and compare its weight, drape, opacity, and stretch with the approved fabric. If the new material behaves differently, the factory may need to reassess the pattern, lining, or hem length before bulk production. Record the substitute in the BOM so the approved material is unambiguous.
3. Should I approve the sample before confirming all colorways?
You can review fit and construction on an initial sample before every colorway is finalized, but material and color changes should be recorded separately. If a new color uses a different fabric finish or dye lot, check whether that change affects the approved appearance or performance.
4. How can I keep my tech pack organized across a large collection?
Assign a unique style number to each design and use consistent file names that include the style, revision, and date. Keep the approved tech pack, sample comments, and material references together. This becomes particularly useful when several dresses share a fabric or trim but have different measurements.
5. What should I confirm before approving a pre-production sample?
Check the PP sample for fit, finished length, skirt balance, slit opening, lining coverage, and the details that changed during development. Record any remaining corrections and confirm whether they must be completed before production starts. The approval should also identify the fabric quality and sample version being signed off.
Conclusion
Before you send a maxi dress for sampling, check that the finished length, skirt construction, fabric, lining, and slit details are documented clearly. If some specifications are still open, list them for discussion rather than treating them as approved requirements.
If you are preparing a maxi dress for sampling, Xiuyu Apparel can review your available design references and discuss the pattern, fabric, and sample requirements. Send your sketch, reference photos, estimated order quantity, and target delivery date to start the discussion.