
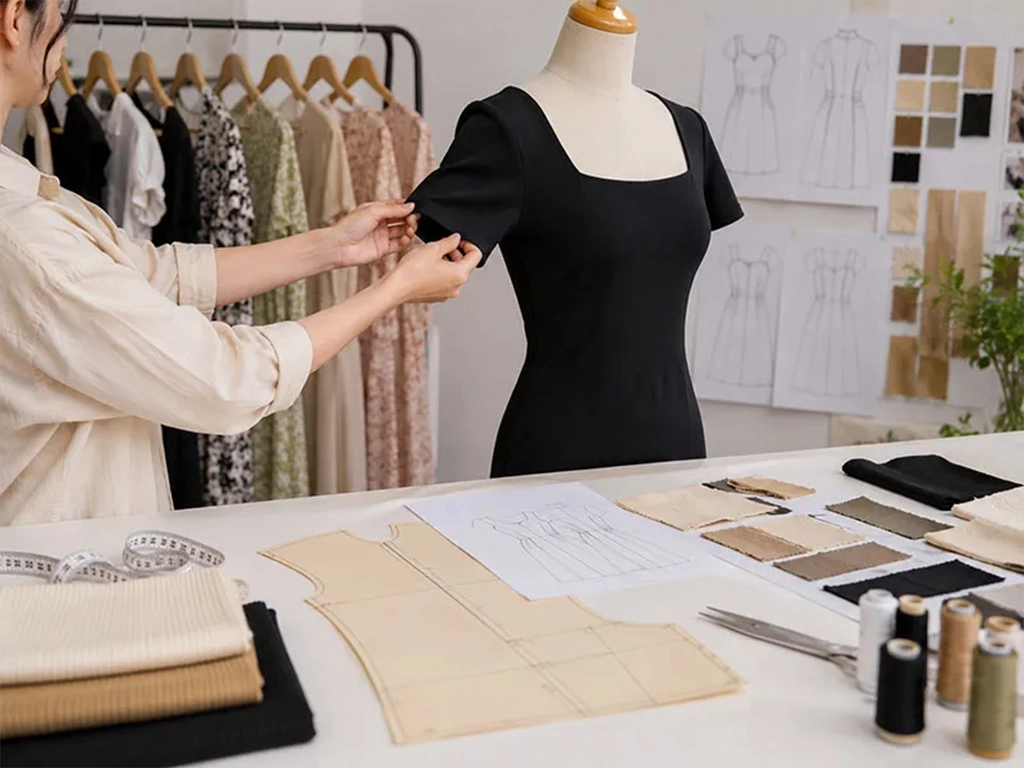
A design photo gives a clothing manufacturer a general idea of the garment, but it rarely provides enough information to start sampling without questions. We may be able to see the silhouette and neckline, for example, while the fabric weight, lining, measurements and internal construction remain unknown. Before estimating the work involved, we need to know which details you have already decided and which ones still need discussion.
You do not need a finished tech pack to make the first inquiry. A useful style brief gives us enough information to review the design, identify missing specifications and discuss the next steps before sample development begins.
What Should a Style Brief Tell Your Clothing Manufacturer?
A style brief should tell the factory what the garment needs to look like, how it should fit and what the order needs to achieve commercially. It should also flag decisions that are still open, such as fabric selection or internal construction. That way, the first discussion can focus on the questions that affect pattern development, sample cost and production planning.
A startup may have only a sketch and reference photos, while an established brand may already have a tech pack and approved material specifications. In either case, the factory needs to know which details are fixed and which can still be discussed.
The amount of documentation differs, but the factory still needs to know which specifications are fixed and where the team has room to suggest alternatives.
From the factory side, the problem is rarely a lack of paperwork by itself. It is the gap between what the buyer expects and what the available information actually tells us.
A photograph might show the shape of a dress, but it will not necessarily reveal the lining, seam construction, fabric weight or support inside the bodice. If those details affect the result, they need to be discussed rather than assumed.
A style brief helps you explain the intended product before every technical detail is finalized.
1. Start with the Design, but Explain What Matters Most
Your design references should show the garment you want to develop as clearly as possible. These can include sketches, technical flats, photographs, mood boards or an existing sample.
Front and back views are useful starting points. Close-up images become important when the design includes a particular neckline, sleeve attachment, gathered waist, decorative seam or unusual closure.
The next step is to explain which details are essential.
Imagine that you are developing a midi dress using three reference images. One shows the neckline you like, another shows the skirt shape, and the third shows the sleeve length. If you send all three without explaining their purpose, the factory has to interpret how they fit together.
Instead, identify the intended combination and note any differences from the references.
You should also describe the overall fit. Is the bodice close-fitting or relaxed? Should the skirt fall straight or have volume? Is the waist seam meant to sit at the natural waist or slightly above it?
These are not minor styling questions. They influence pattern proportions and can affect how the garment looks when made in the intended fabric.
Tell the factory which features cannot change and which ones you are willing to reconsider. If the neckline and overall silhouette are central to your design, say so before discussing possible fabric substitutions or finishing options. This helps the pattern and sample teams focus on the right priorities instead of making assumptions about which details matter most.
2. Describe the Fabric You Want, Not Just Its Name
Fabric selection is one of the areas where a brief can look complete while leaving important questions unanswered.
You might specify satin, chiffon, crepe or jersey, but each category includes materials with different weights, surface finishes, stretch characteristics and drape. The name alone may not tell the sourcing team which material will suit your design.
Have you already chosen a fabric? Include the fiber composition, GSM or other available weight information, supplier reference and a swatch if you have one. If sourcing is still open, describe how the garment should drape, how much coverage you expect and whether the fabric needs stretch and recovery. Those points give the sourcing team a more useful starting point than a fabric name alone.
For a flowing dress, you may want a lightweight fabric that provides enough coverage without adding a lining. For fitted jersey styles, stretch and recovery matter because the garment needs to retain its shape after wear. These performance requirements help narrow the fabric options before sampling.
Those requirements help narrow the options more effectively than a general instruction to use a soft fabric.
You should also identify color requirements. A Pantone reference, approved swatch or existing garment can provide a clearer starting point than a color name alone.
If you have not chosen the fabric, tell us what the garment needs to achieve and what price range you are working toward. A substitute may look similar on a swatch but behave differently once it is cut and sewn. For a lined dress, for example, the fabric weight and opacity can affect the lining choice; for a fitted jersey style, stretch and recovery can influence both the pattern and the finished fit. The proposed material should be reviewed before it is treated as approved.
Do not treat a suggested fabric as approved until both sides have confirmed the selection.
3. Identify Construction Details That Could Change the Sample
A reference photo may show a clean neckline without revealing whether it needs facing, interfacing, lining or internal support. The same issue comes up with gathered seams, concealed zippers and structured bodices. If these details affect the finished look or fit, include a close-up reference or explain the result you expect, even if the exact construction method has not been decided.
Depending on your design, your brief may need to identify:
- Neckline, strap and sleeve construction
- Lining and interfacing requirements
- Zippers, buttons, hooks and other closures
- Pockets, gathers, pleats and decorative seams
- Embroidery, appliqué, beading or other embellishments
- Hem finishes and visible stitching details
For a strapless dress, the pattern maker needs to consider more than the neckline shape. The fabric’s weight, the fit through the bust and the support built into the bodice all affect how securely the dress sits on the body. The sample room can assess these together during development rather than copying the visible outline of a reference photo.
Your brief should distinguish between the result you require and the method used to achieve it. You may insist on a particular appearance while allowing the pattern department to recommend suitable internal construction.
The same principle applies to embellishments. If embroidery or beading must follow a specific placement, provide a marked image or drawing. If you are still deciding on the arrangement, label it as provisional.
This gives the sample room a clear direction without treating an unfinished design as a final specification.
4. Give the Factory a Clear Starting Point for Fit and Sizing
If you have a measurement chart, include it. If you are developing a new style without one, explain the intended fit and identify the base size you want to work from.
Your brief should state the planned size range, such as XS–XXL, where known. It should also include important finished-garment measurements, garment length and any fit requirements that distinguish the style.
Be careful with reference measurements. A model’s body measurements are not the same as the measurements of the finished garment. Likewise, the dimensions of an existing dress may not produce the same fit when the fabric or pattern changes.
If you already have a sample, explain whether the factory should follow its measurements or use it as a visual reference only.
Point out the measurements that have the biggest effect on fit. On a fitted dress, bust, waist and hip measurements may determine whether the garment sits correctly without pulling across the body. On a loose style, shoulder width, sleeve opening or finished length may be more noticeable. The sample review should give these measurements particular attention, while still checking the rest of the specification.
A complete grading specification may be developed later, but the initial fit direction should be clear enough to guide the first sample.
5. Include the Commercial Information Behind the Design
A style brief is not only a description of the garment. It also needs to explain the order you are planning.
Start with your estimated quantity per style, the number of colorways and the intended size range. If you know the size breakdown, include it. If the figures are still estimates, label them accordingly.
Consider an order of 300 dresses. If all 300 use one approved color, fabric booking and cutting can be planned around that material. If the same quantity is split across three colorways, each color may need separate fabric quantities, shade approval and cutting arrangements. If a custom-dyed fabric is involved, the minimum dye lot and available stock may also affect how the order is costed. The total quantity alone does not tell the factory the full production requirement.
Next, provide your target garment cost if you have one. Make clear what the figure includes and which currency you are using. Do not assume that packaging, freight, duties or other charges are included in a garment quotation unless the scope has been agreed.
If the estimated cost is above your target, identify the features that must stay and the ones you are willing to review. A particular fabric, elaborate beading or a complex lining may contribute more to the cost than a small change in silhouette. Ask the factory to explain the main cost drivers before deciding which alternatives to consider. A cheaper option is only useful if the garment still meets your design and quality requirements.
You should also explain the purpose of the first sample. Are you testing an early design idea, checking fit or confirming a nearly finished specification? The expected work can differ considerably between these situations.
6. Record Branding and Packaging Requirements Early
For private-label projects, branding details should not be left entirely until the order is ready for production.
If you already have a main label, care label, hangtag, barcode or branded packaging design, include the relevant files or references. If the requirements are not finalized, list them as pending.
A main label, care label or hangtag can often be finalized during development, but its artwork, size and attachment position should be checked before the relevant components are prepared. If your retailer requires a specific barcode format, label layout or packing method, share those instructions early. A late change may mean revising artwork, replacing prepared components or repacking finished garments.
You do not need to provide every final packaging specification in the first message. The important point is to identify the requirements that could influence the finished product or order preparation.
If your retailer or sales channel has specific labeling or packaging requirements, mention them before production specifications are approved.
7. Set a Development Timeline That Reflects the Actual Work
Your brief should include the date by which you need the sample, the intended launch date and the expected bulk delivery date, where known.
These dates serve different purposes. Receiving a sample does not mean the product is ready for bulk production, and approving a sample does not automatically mean all production materials are available.
Allow time for material sourcing, pattern development, sample review, fit corrections and final approval. Custom colors, printed fabrics and special trims may require additional preparation.
If you have a fixed retail delivery date, tell the factory. If your preferred date can move, make that clear as well.
The timeline should also reflect your own approval process. If several people need to review a sample, establish who will consolidate the feedback and make the final decision.
When reviewing a sample, collect feedback from your design, buying and fit teams before sending it to the factory. If one message asks for a tighter waist while another asks for more ease, the pattern maker cannot tell which fit direction has been approved. Send one marked-up photo set with the required measurements and a consolidated list of corrections, then confirm the priority changes for the next sample.
What If Some Information Is Still Missing?
You can start a discussion with a sketch, a reference dress and an estimated quantity, even if the fabric has not been selected. In that case, explain the intended drape, opacity and target cost, and ask the factory which material options are worth sampling. The next step is not to finalize every detail immediately, but to identify what must be decided before a sample can be assessed properly.
If you are deciding between two necklines or sleeve designs, show both options and explain which one you currently prefer. That makes the discussion more useful than sending several images without identifying the differences.
Avoid presenting an assumption as a final decision. If the lining, measurements or trim selection is not confirmed, mark it clearly.
This distinction also helps when reviewing quotations. An estimate based on an assumed fabric or simplified construction should not be treated as equivalent to a quotation based on fully confirmed specifications.

How to Keep the Brief Useful During Sample Development
Your style brief should remain a reference as the design develops, rather than becoming an outdated file after the first discussion.
Keep the latest approved drawing, measurement chart and material references together under the same style number and revision date. When the neckline, garment length or fabric changes, update the relevant file and identify which version the sample room should follow. Before bulk cutting starts, check that the approved sample and production documents refer to the same specifications. An old drawing left in the file can be just as confusing as a missing one.
If a fabric or trim is changed after sample approval, record who approved the substitution and whether it applies to the current order or future production as well.
Before approving the sample, compare it with the agreed requirements. Review the fit, measurements, fabric behavior, construction and finishing, then record any outstanding corrections.
Once the final sample is approved, the production team needs a clear reference for bulk manufacturing. Any changes made after approval should be documented and agreed rather than communicated informally.
This record becomes particularly useful when you reorder a style or develop another colorway later. Your team can identify which specifications were approved instead of reconstructing the decisions from old messages.
Style Brief Checklist Before Contacting a Clothing Manufacturer
Before contacting a clothing manufacturer, gather the information you already have:
- Design: Sketches, technical flats, reference photos and the intended silhouette.
- Fit and sizing: Base size, available measurements, planned size range and fit priorities.
- Fabric and color: Composition, weight, swatches, color references or sourcing preferences.
- Construction: Lining, closures, seams, embellishments and any details that affect the finished look.
- Order plan: Estimated quantity, colorways and size breakdown.
- Budget: Target garment cost, currency and any known quotation requirements.
- Branding: Main labels, care labels, hangtags, barcodes and packaging instructions.
- Timeline: Sample review date, target launch and expected bulk delivery.
- Open decisions: A separate list of details that still need confirmation.
You can send the brief before every item is finalized. Mark estimates and undecided specifications clearly so the factory knows what can be assessed now and what needs approval later.
Frequently Asked Questions
1. What if my manufacturer recommends a different fabric from the one I requested?
Ask why the factory is recommending the change and compare the proposed fabric with your original requirements. Check the weight, drape, opacity, stretch and recovery where relevant, rather than judging the material by appearance alone. For a lined dress, confirm how the replacement works with the lining and finished silhouette. Approve the substitution only after reviewing the swatch or sample and agreeing on the final material reference.
2. How should I handle disagreements about a sample revision?
Consolidate the feedback and refer to specific measurements, marked photographs or agreed design requirements. Avoid general comments such as “the fit looks wrong” without identifying the affected area. If the team interprets a correction differently, clarify the expected result before another sample is made.
3. Can I change the design after approving the sample?
You can request a change, but first check what it affects. A revised neckline, fabric or lining may require pattern adjustments, new materials or another sample review. Ask the factory to assess the cost and schedule implications before confirming the change, particularly if bulk materials have already been prepared.
4. How can I protect my design when sharing it with a manufacturer?
Keep dated copies of your original sketches, reference files and design revisions. Before sharing confidential material, discuss appropriate written confidentiality terms and clarify ownership of patterns, development files and revisions. The specific protections available depend on the agreement and applicable law, so do not rely on file labels alone.
5. What should I do if my first sample does not match the intended design?
Mark the problem areas on the sample photos and include measurements wherever a specific fit correction is needed. For example, if the waist is too loose, state the intended finished measurement rather than asking the factory to make it simply “tighter.” Keep design changes separate from measurement corrections, then agree on the revision list before the next sample is made.
Conclusion
You do not need every specification finalized before approaching a clothing manufacturer. What matters is giving the factory enough information to assess the design, identify technical questions and understand the order you are planning. A well-prepared brief can make the first quotation and sample discussion more useful, while leaving room to resolve details that require material testing or fit review.
If you are preparing a new dress collection, visit Xiuyu Apparel’s dress manufacturer page to learn more about our OEM and private-label development services.