

When you develop a dress for your collection, the closure needs to work with the fabric, fit and construction—not just look right on a design sketch. A zipper that pulls on lightweight satin, a snap that damages thin fabric or buttons that leave gaps across the bust can all lead to sample revisions. In our sample room, we review these details before cutting the first sample. Changing a zipper position or adding reinforcement at this stage is much easier than correcting the construction after the sample has been sewn.
What Are Dress Closures?
A dress closure is the fastening used to open and secure a garment. It affects how the wearer gets into the dress, where the opening sits and how neatly the garment closes against the body.
Some closures are visible parts of the design, such as a row of buttons on a shirt dress. Others are intended to stay out of sight, like an invisible zipper or a small hook-and-eye at the top of a back opening.
When choosing a closure for a new dress style, start with three practical questions:
- Opening position: Does the dress open at the back, side, front or waist?
- Garment structure: Is the opening located on a fitted bodice, a loose skirt or a stretch panel?
- Fabric behavior: Can the fabric support the fastening without stretching, tearing or becoming distorted?
These details affect the pattern and sewing method. A closure should therefore be decided during product development rather than added after the garment construction has already been finalized.
Common Types of Dress Closures
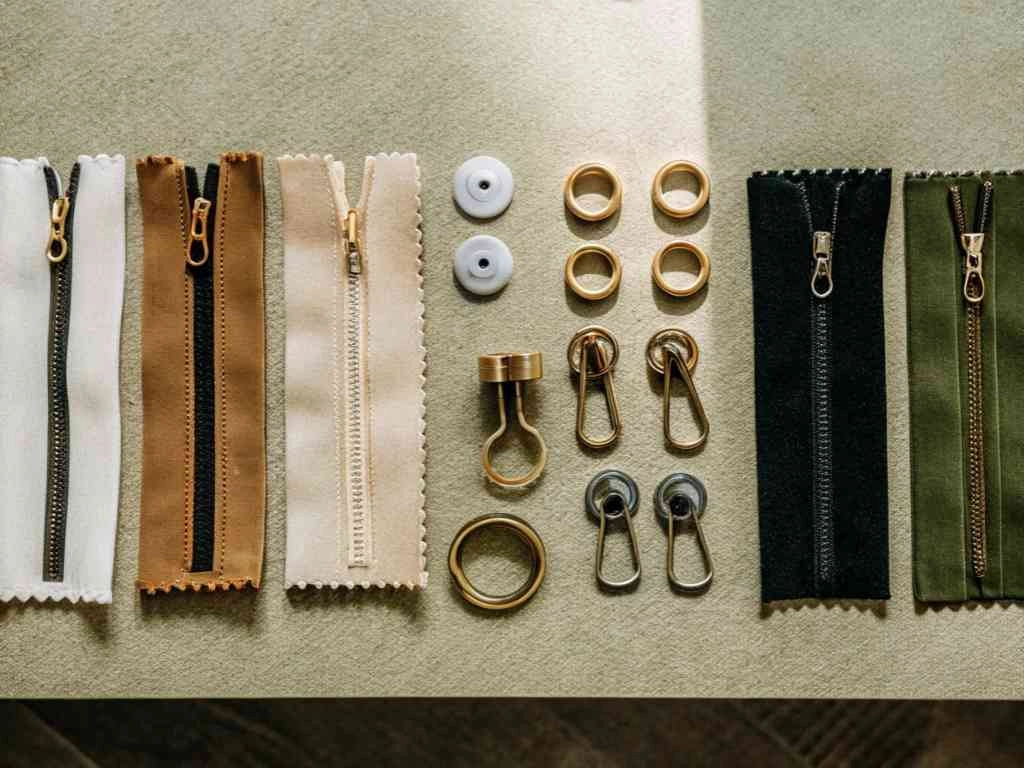
The most frequently used closures in dress production are zippers, buttons, snap fasteners and hook-and-eye fasteners. Each serves a different purpose, and some designs require two types working together.
1. Zipper Closures
Zippers are a practical choice when you need a longer, secure opening. They are particularly common in fitted dresses, eveningwear, skirts and formal styles.
The main options include:
- Invisible zipper: The teeth are concealed inside the seam, leaving a clean appearance on the outside.
- Nylon coil zipper: Flexible and lightweight, suitable for many everyday and fashion dresses.
- Metal zipper: Has visible metal teeth and can be used as a functional or decorative feature.
- Exposed zipper: Intentionally visible on the garment, often used as part of the design.
- Separating zipper: Allows the two sides of the opening to come apart completely, although it is less common in conventional dresses.
Color and length are only part of the decision. Check the zipper weight, tape flexibility and how smoothly the slider moves, especially when it will be sewn into a lightweight or fitted dress.
On lightweight satin, a heavy zipper can pull against the back seam and affect how the fabric hangs, particularly through a narrow fitted section. An invisible zipper often gives a cleaner finish, but the surrounding fabric still needs to stay stable during sewing.
At the lower end of the opening, we check how the tape and seam are secured. This area can receive repeated pulling when the wearer gets in and out of the dress, particularly on fitted styles. The zipper should also be long enough for comfortable dressing without interfering with the waist seam or other construction details.
2. Button Closures
Buttons are often used on shirt dresses, front-opening dresses, cuffs and bodice details. Unlike concealed fasteners, they can become a visible design feature.
Common options include:
- Flat buttons: Used with conventional buttonholes, especially on shirt-style dresses.
- Shank buttons: Have a raised attachment underneath, leaving room for thicker fabric or layered construction.
- Fabric-covered buttons: Wrapped in matching or contrasting fabric for a coordinated finish.
- Decorative buttons: Used primarily for appearance, sometimes alongside a separate functional closure.
When specifying buttons, include the diameter, thickness and weight as well as the spacing between them. These details affect both the appearance of the placket and how well it stays closed when worn.
One issue we look for during sampling is the opening between buttons. If the spacing is too wide, a shirt dress may pull open across the bust or waist when worn. If the fabric is lightweight, the button area may also need interfacing or another form of reinforcement.
If your design uses decorative buttons, make that clear in the tech pack. The sample room needs to know whether they are functional or simply placed over a concealed fastening.
3. Snap Fasteners
Snap fasteners connect through two matching components that press together and separate when pulled apart. They are useful when you need a small opening without adding a conventional buttonhole.
There are two common options:
- Sew-on snaps: Attached with stitching and often used for discreet closures.
- Press-stud snaps: Fixed through the fabric using a setting tool and matching hardware components.
You may use snaps at the neckline, inside a placket, along a small opening or as an additional fastening on a wrap-style dress.
Fabric thickness makes a difference when fitting press studs. A snap that holds securely on a medium-weight woven fabric may pull through thin chiffon or leave visible marks on delicate mesh unless the attachment area is reinforced.
Once attached, check both sides of the fabric. The snap should close securely, with no exposed hardware edges, rough backing or visible distortion around the attachment point.
4. Hook-and-Eye Closures
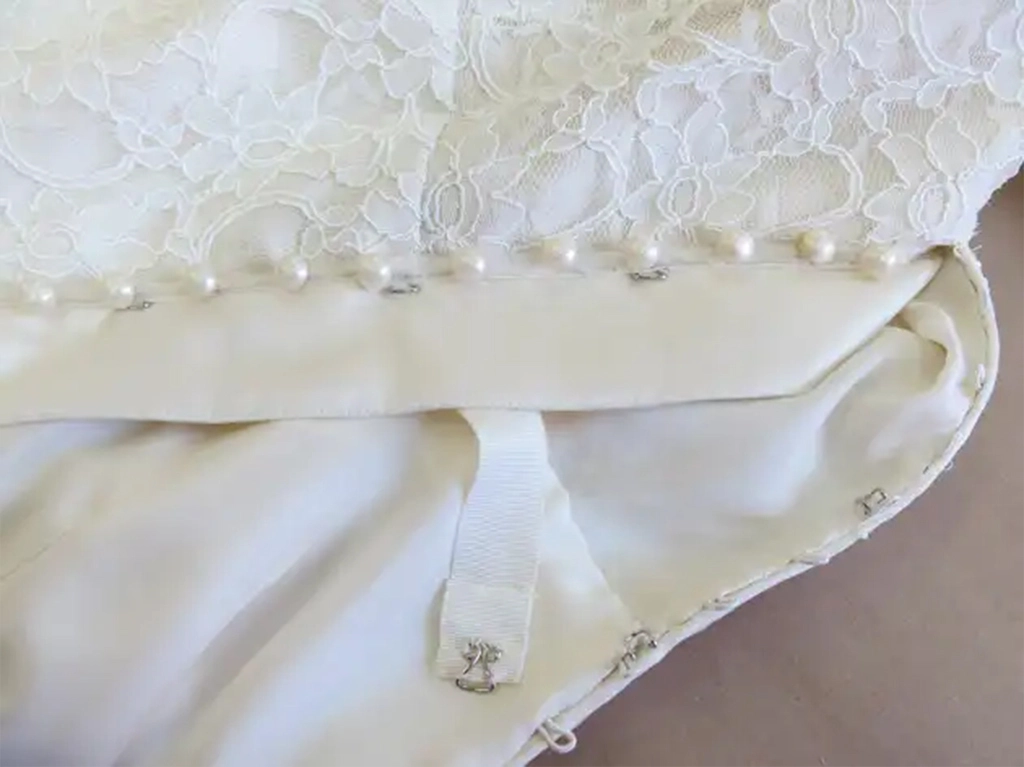
Hook-and-eye fasteners consist of a small metal hook and a matching loop or eye. They provide a discreet way to hold two garment edges together.
They are commonly used at:
- The top of a back zipper
- Waistband openings
- Back neckline openings
- Fitted bodice closures
- Small openings where a bulky fastening is unnecessary
You will often find a hook-and-eye used together with an invisible zipper. The zipper closes the main opening, while the hook-and-eye secures the top edge.
The hook and eye must line up when the opening is closed. If one component is sewn too high or too far to the side, the neckline or waistband can sit unevenly.
For a fitted dress, we also check whether the fastening is carrying too much tension. The hook should hold the opening in position, not compensate for an incorrectly fitted pattern or an unstable seam.
Zippers vs Buttons vs Snaps vs Hooks: Which Should You Choose?
The right choice depends on the opening and the construction of each dress. The table below compares the main options used in dress production.
| Closure Type | Suitable Dress Applications | Main Benefit | What You Need to Check |
|---|---|---|---|
| Invisible zipper | Fitted, evening and formal dresses | Clean, concealed opening | Seam stability and zipper length |
| Metal or exposed zipper | Fashion and statement dresses | Visible design detail | Weight, finish and placement |
| Buttons | Shirt dresses and front openings | Functional and decorative | Spacing, buttonholes and reinforcement |
| Snap fasteners | Small plackets and neckline openings | Quick fastening | Fabric strength and attachment |
| Hook and eye | Waistbands and zipper tops | Discreet, low-profile fastening | Alignment and holding strength |
There is no reason to use the same closure across every style in your collection.
A fitted dress with a back opening may need an invisible zipper and a small hook-and-eye. A shirt dress usually works better with a button placket. A lightweight dress with a small neckline opening may only need a sew-on snap.
Before choosing the hardware, check where the opening sits and how much movement the garment needs to allow. A fastening that looks suitable on paper may create bulk or restrict movement once sewn into the dress.
How Fabric Affects Dress Closure Selection
The same zipper or snap can behave differently on different fabrics. Weight, stretch, thickness and surface texture all influence how the opening looks and performs after sewing.
Satin and Silk
Satin and silk can be slippery during cutting and sewing. Some lightweight versions also show small stitching or pressing marks quite easily.
For fitted satin dresses, invisible zippers are a common option. However, the zipper tape needs to be controlled during installation so the seam does not become wavy.
If you plan to use buttons or snaps, pay attention to the fabric behind the fastening. Thin material may need a small reinforcement layer to prevent the components from pulling through.
Chiffon and Georgette
Chiffon and georgette are lightweight fabrics, so heavy hardware can affect how the finished dress hangs.
A lightweight zipper or small sew-on fastener may be more suitable than a bulky metal component.
Where the zipper runs through both the outer fabric and lining, check that the two layers are joined evenly. Excess fabric at the seam can create bulk, while uneven tension may cause the lining to twist when the dress is worn.
Jersey and Stretch Fabrics
Jersey dresses need closures that work with the fabric’s stretch and recovery.
A rigid zipper inserted into a highly stretchable area may restrict movement. The seam can also become uneven if the fabric stretches during installation.
If your design requires a zipper, the sample should be checked both flat and on the body. For some pull-on jersey dresses, you may not need a separate closure at all. The pattern and fabric stretch may already provide enough room for dressing.
Crepe and Structured Fabrics
Crepe varies in weight and structure. Medium-weight versions can work with invisible zippers, buttons or hooks, depending on the garment design.
For heavier or more structured crepe, check the thickness where the zipper, facing and lining meet. Too many layers can make the opening bulky and difficult to press cleanly.
After sewing, check that the zipper or other fastening lies flat and does not distort the surrounding seams.
Which Closures Work Best for Different Dress Styles?
Your dress silhouette and opening position will narrow down the available options.
| Dress Style | Common Closure Choices | Main Development Considerations |
|---|---|---|
| Bodycon Dress | Invisible zipper, hook and eye | Stretch, fit and seam stability |
| Evening Dress | Invisible zipper, hook and eye | Clean finish and secure opening |
| Shirt Dress | Buttons, snaps | Placket width and button spacing |
| Wrap Dress | Ties, snaps, hooks | Overlap coverage and movement |
| Slip Dress | Invisible zipper or no closure | Side seam appearance and ease of dressing |
| Corset Dress | Zipper, hooks, lacing | Internal support and tension distribution |
| Backless Dress | Small hooks, snaps or concealed zipper | Placement and skin comfort |
On a bodycon dress, the zipper seam needs to withstand movement as well as body tension. Check how it behaves when the wearer sits, bends and walks rather than judging the fit from a hanging sample.
For a corset dress, the fastening must work with the internal structure. Boning, lining, panel seams and the closure all contribute to the finished fit. The zipper should not be expected to carry the tension that belongs to the bodice construction.
For a wrap dress, check the overlap while the garment is worn. A fastening may look correctly positioned on a flat sample but still allow the front panels to separate during movement.
Common Dress Closure Problems During Production
Some problems appear as soon as the first sample comes off the sewing machine. Others only show up during fitting or after the closure has been opened and closed repeatedly.
Zipper Seam Distortion
A zipper that creates waves or puckering can affect the whole appearance of a fitted dress.
This may happen when the fabric stretches during sewing, the zipper tape is not controlled properly or the seam tension is uneven.
We check the zipper with the dress laid flat, then repeat the inspection during fitting to see whether the seam pulls or becomes wavy on the body. If the fabric pulls away from the zipper, the team may need to review the sewing method, stabilization or pattern.
Button Gaps Across the Opening
If the fabric opens between buttons, the problem may be related to button spacing, garment ease or the position of the opening.
Sewing on extra buttons will not necessarily solve the problem. Check the bust or waist ease first, then review the button spacing and placket construction.
Snaps Pulling or Tearing the Fabric
A snap that is too large or poorly supported can leave holes, stretched areas or visible indentations.
For press studs, the fabric thickness and setting method need to be suitable for the hardware. If the first sample shows damage around the fastening, review the snap size and reinforcement before continuing.
Hook-and-Eye Misalignment
Hooks and eyes need to meet at the correct position. Even a small placement difference can make the opening sit unevenly.
Check the finished garment rather than relying only on the measurement between the two components. The fastening should hold the edges together without pulling the neckline or waistband out of shape.
Different Results Between Sample and Bulk
A closure can look correct on the approved sample but be installed differently during bulk sewing if the placement and construction details are not clear.
This is more likely when several operators are working on the same style or when the fastening position is not marked in the production specification.
The approved sample, technical drawing and written measurements should provide the same reference.
How Clothing Manufacturers Check Dress Closures Before Bulk Production
Waiting until final QC to check closures is too late. Problems with zipper placement, snap reinforcement or button spacing are easier to correct during sampling and should be checked again on the production line.
Our pattern and sample teams check the opening during development. The same details are then checked again on the sewing line and during final inspection.
1. Before the First Sample
Before pattern cutting, our pattern and sample teams confirm where the opening will sit, how it will be constructed and whether the fabric needs reinforcement around the fastening.
For example, a zipper running through a fitted bodice may need a different construction from one placed in a loose side seam.
If the design uses snaps or hooks, the team also checks whether the fabric needs reinforcement and whether there is enough space for the fastening components.
2. During Sample Fitting and PP Approval
After sewing, we open and close each fastening repeatedly, then check how it performs during fitting.
Check:
- Whether the zipper moves smoothly without catching.
- Whether the buttonholes match the button size.
- Whether snaps close securely without damaging the fabric.
- Whether hooks and eyes meet correctly.
- Whether the opening remains flat when the dress is worn.
- Whether the closure affects the intended fit.
If the design requires changes, record them before the next sample is made.
The approved PP sample should show the final closure type, position and construction method.
3. During Bulk Production and Final Inspection
On the production line, inspect the first few garments for correct zipper placement, button spacing and snap attachment before the same operation is repeated across the order.
At final inspection, compare the finished closures with the approved sample and specifications.
Pay attention to loose stitching, damaged fabric, uneven placement, incorrect hardware and poor operation. For orders with specific testing or inspection requirements, confirm the acceptance criteria before production begins.
What Closure Details Should You Include in a Tech Pack?
A reference photo may show the button or zipper you want, but it usually does not tell the sample room its exact size, position or attachment method.
If you are preparing a tech pack, include the following details where applicable:
| Specification | Information to Provide |
|---|---|
| Closure Type | Invisible zipper, coil zipper, metal zipper, button, snap or hook and eye |
| Position | Center back, side seam, front placket, neckline or waistband |
| Size | Zipper length, button diameter or hardware dimensions |
| Color | Matching, contrasting or specified color reference |
| Material | Metal, plastic, fabric-covered or other material |
| Quantity | Number of buttons, snaps or hooks |
| Construction | Concealed, exposed, sewn-on or press-fitted |
| Reinforcement | Interfacing, backing or additional fabric support |
| Reference | Close-up image, technical drawing or physical sample |
For zippers, specify the finished length, type of slider, tape color and whether the zipper should be concealed or exposed.
For buttons, include the size, material, finish, spacing and whether they are functional.
For snaps and hooks, identify the complete fastening set, position and attachment method.
If you have not chosen the final hardware, mark it as pending in the tech pack. This tells the sample team that the specification still needs to be confirmed.
This also helps when you are comparing quotations. Two factories may quote different closure specifications even when they are working from the same dress photograph.
FAQs About Dress Closures
1. Can I use my own buttons, zippers or custom hardware for production?
Yes. You can supply your own trims if the components are suitable for the garment construction. Before the factory starts sampling or bulk production, send a physical reference of the hardware together with its size, finish and attachment requirements.
2. What should I do if my preferred hardware has a high minimum order quantity?
Ask your supplier whether the same design is available in a standard size, finish or color. You can also compare stock alternatives before committing to custom tooling. Check the appearance on a garment sample before making a purchasing decision.
3. Can I use different closure suppliers for sampling and bulk production?
You can, but the components should be checked before bulk cutting and sewing. A replacement zipper or button may have a different size, finish or weight even when the product description looks similar. Approve the replacement against the original sample first.
4. How should I handle a closure that fails during customer wear?
Start by checking where the fastening failed. A button that has come loose, a broken zipper slider and fabric torn around a snap each point to a different possible cause. Keep the returned garment, record the problem and check whether it relates to the hardware, attachment or surrounding construction before deciding on corrective action.
5. Can I reduce garment costs by changing to a cheaper closure?
Possibly, but compare the complete fastening cost rather than the component price alone. A cheaper button may require more sewing work, while a different zipper may change installation time. Check the finished appearance and performance before approving any cost-saving substitution.
Conclusion
A dress closure affects the fit, fabric appearance and construction around the opening. Confirm its type, position, dimensions and attachment method on the approved sample, then carry those specifications into bulk production. If you are developing a new dress collection, you can send your sketches, reference photos or tech pack to Xiuyu Apparel for a review of the closure, fabric and construction requirements before sampling.